Webmin is a free and open source web-based control panel for managing a dedicated or virtual private server. Webmin works well for server administrators with intermediate as well as advanced level knowledge.
In this post I look at how to install Webmin on Centos Linux.
Installing webmin
To begin installing Webmin you must have root level shell access (SSH) to your server. You can login as root or simply run the following command to switch to root:
su -
Enter the root password and you will have root level access to your server.
To download and install the latest version of Webmin just type the following command:
rpm -i http://www.webmin.com/download/rpm/webmin-current.rpm
After Webmin is installed you must make sure that it runs automatically at system startup:
chkconfig --level 2345 webmin on
Start Webmin by entering the following:
service webmin start
By default Webmin listens to port number 10,000. For security reasons its quite likely that you don’t have all ports accessible on your server. So you must poke a hole in your firewall to allow access to Webmin:
iptables -I INPUT  -p tcp --dport 10000 -j ACCEPT ;

/etc/init.d/iptables save
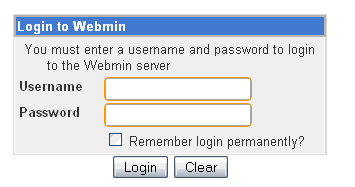
Now if you visit http://<mainserver ip address>:10000 in your web browser you should see the Webmin login prompt. For example if you server ip is 192.168.0.1 then you would visit http://192.168.0.1:10000.

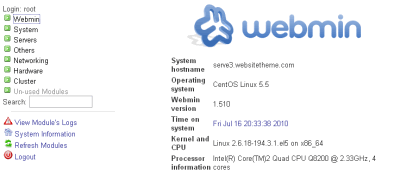
Just enter ‘root’ as the username and use your root password to login. Once you login you should see the following web page:
On the right hand side you have some basic information and statistics about your server. Things like server load, memory usage etc. On the left hand side you have a menu that you can use to manage your system.
Secure access
One of the first things I do after installing Webmin is to enable SSL access. SSL encrypts the connection between your browser and your web server when using Webmin. This prevents eavesdropping as you carry out sensitive server management tasks.
On the left hand menu click on Webmin > Webmin Configuration. Then on the right hand side scroll down to the bottom and click on SSL encryption. On the next page select “yes” under “Enable SSL if available?” and click on save. Now you may have to re-login at https://<your serverip>:10000.
At this stage your web browser is likely to complain that the SSL certificate is not upto the mark. That is because its a self signed certificate that hasn’t been approved by any independent authority. However, it is perfectly safe so you should add an except to it. In Firefox for example you would do the following:
- Visit https://<your serverip>:10000.
- Firefox will display a warning page. Click on “I understand the risks”.
- Click on “get certificate” on the new window that pops up.
- Make sure “permanently store this exception” is checked. Click on “confirm security exception”.
Now you will be able to manage your server via a secure SSL connection using Webmin!


You should also create a new certificate.
It will still be self signed, but it will also be unique.
Hi,
Thanks for the articles, i installed webmin successfully on centos 6.3 by following this. as well i enable the SSL by installing openssl and openssl-devel by yum command. after that i click in webmin for installed SSLayer module and webmin does this itself.
Note: you need zlib-devel and krb5-devel required for installing and compiling this. so make sure you installing the both as well by yum install command
This is the only Configure that work with me .
I was searching for two days all tutorial no mention Webmin listens to port issue .